Bastion Upgrade and AFK Farming Notes
A practical route for testing Bastion upgrades, safe hold spots, and credit-focused farming without wasting early purchases.
2026 guideSurvive Zombie Arena Wiki Hub
Jump into codes, class tiers, weapon routes, value priorities, and source-labeled guide notes for the Roblox zombie wave survival game.
Official Images
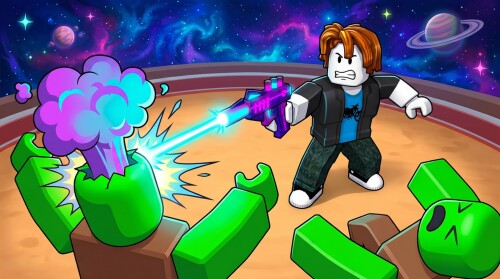
Official Roblox visuals are placed near the top of the page so users can confirm the game setting before reading codes, class routes, weapons, and wave planning advice.
Latest Updates
Start with the freshest wiki modules before jumping into codes, loadouts, class choices, weapons, credits, waves, and official update tracking.
A practical route for testing Bastion upgrades, safe hold spots, and credit-focused farming without wasting early purchases.
2026 guideCompare simple solo setups, support builds, credit-farm routes, and high-wave team compositions before entering a long run.
2026 guideUse early damage upgrades, crowd-control choices, and rifle-style pressure to keep wave clears stable as enemy density rises.
2026 guideA conservative checklist for cooldown timing, elite focus fire, lane control, and Auto Skip discipline in harder runs.
2026 guideSurvive Zombie Arena Navigation
This homepage is built as a compact wiki front page: choose the module that matches your search, then use source labels before trusting a code, tier, class cost, weapon stat, or farm route.
Track reported rewards, redeem steps, verification status, and safe code-check habits before the next run.
Start hereFirst-run route, early Credits, safe angles, weapon upgrades, and the first reliable class path.
Tier listCompare Necromancer, Medic, Marksman, Tactician, Demolitionist, Engineer, Ninja, and Survivor by role.
9 classesCost, role, and unlock-priority notes for every tracked class in the current wiki structure.
10 weaponsWeapon route planning from starter damage into shotgun, rifle, and named weapon watchlist decisions.
LoadoutsSolo, credit farming, support, high-wave, and leaderboard setup ideas with clear role logic.
CreditsA repeatable Credit loop for rewards, damage upgrades, gear discipline, class savings, and Auto Skip timing.
WavesWave pacing, buy-phase spending, lane control, elite focus, and safer high-wave progression.
GearBarricades, turrets, traps, sustain tools, and utility timing for cleaner defense.
EnemiesStandard zombies, elites, large packs, fallen zombies, and movement-change pressure rules.
LeaderboardHighest-wave planning with stable roles, controlled skips, cooldown discipline, and run protection.
Official linksRoblox game page, Discord, studio group, update watchlist, and source boundaries.
Codes
Redeem-code pages attract fast traffic, but fake certainty is risky. This site separates reported code claims from verified official evidence, then sends players to the code page for the current status.
Open codes pageBeginner Guide
New players should not chase every class or weapon at once. A clean opening route uses free rewards, safe positioning, disciplined Credit spending, and one reliable class path.
Check code claims and official announcements before the first queue so your opening economy is not wasted.
Use simple lanes, avoid overextending, and let teammates cover flanks instead of chasing every zombie pack.
Stable clear speed keeps Credits flowing. Buy defense only when a lane is actually at risk.
Pick one class path that fits your role before spreading Credits across every option.
Classes Tier List
Class value is based on late-wave control, team safety, Credit efficiency, and how clearly the class solves a real wave problem.
Highest late-wave ceiling when zombie density is high and the team can protect setup windows.
Reliable sustain for public runs and long sessions where mistakes usually end the attempt.
Consistent ranged damage and elite cleanup when positioning and target focus are disciplined.
Strong defensive anchor for organized chokepoints and high-wave lane control.
Good crowd control for packed lanes, especially when the team groups enemies correctly.
Useful mobility and clutch recovery, but less stable than core team picks in dense late waves.
Helpful for learning structure defense, but can be outscaled by stronger late-game anchors.
Starter baseline for learning the loop before committing Credits to a class path.
All Classes
Compare class cost and role before spending Credits. The goal is not to unlock randomly, but to buy the next role that improves your current run type.
Starter learning class
Team sustain and safer public progression
Ranged damage and lane cleanup
Turret and barricade fundamentals
Movement, recovery, and risky clutch plays
Explosive crowd control
Advanced defensive structure control
Late-wave scaling and burst windows
Weapons Guide
Weapons are the first power spike because faster clears produce safer buy phases and steadier Credits. Treat named weapons as a watchlist until direct stats are verified.
Open weapons pageBridge weapon: Use it to clear the first packs while banking Credits. Do not treat it as your long-term damage answer.
Crowd control: Move into spread damage when zombies start grouping and lanes need faster close-range clears.
Sustained pressure: Shift toward steadier ranged damage once waves last longer and elite targets need clean focus fire.
Synergy: Match weapons to role: Marksman wants long angles, Tactician protects chokepoints, Medic balances support with clear speed.
Best Loadouts
Strong loadouts align class, weapon route, gear placement, and Credit priority. Solo players need simple survival, while high-wave teams need defined jobs.
Credits Farm
The Credit loop is simple: survive waves, earn Credits, upgrade the right bottleneck, then push higher waves. The mistake is spending every Credit just because a button is available.
Check code and update notes before entering a long session so any reward can affect your first upgrades.
Bank Credits through easy waves and upgrade when your damage starts slowing the team down.
Faster clears usually create better income than scattered defensive purchases.
A barricade and covered turret can preserve uptime without starving your main weapon path.
Reliable ranged kills help turn repeated waves into cleaner Credit loops.
Do not drain savings right before Demolitionist, Tactician, or Necromancer unlock thresholds.
Auto Skip is profitable only when the team is already clearing waves comfortably.
Wave Guide
Good wave runs are not only about speed. They depend on buy-phase discipline, lane ownership, elite target priority, and careful Auto Skip timing.
Group with nearby players and identify where the first barricade, turret, or firing angle matters.
Clear simple zombies while saving toward the first meaningful damage upgrade.
Upgrade weapons, patch health when needed, and place basic gear before pressure spikes.
Let defensive, damage, and support roles do different jobs instead of crowding one lane.
Skip only after a clean wave and after core placements are already handled.
Hold large tools for elite pressure and compressed packs, not scattered stragglers.
Leaderboard value comes from staying alive longer, not from rushing every early wave.
Gear And Perks
Defensive gear is strongest when it protects a clear lane plan. Random barricades and exposed turrets waste Credits; protected structures buy time for damage roles.
Slow pressure and define the lane your team will defend.
Place them behind cover so they keep firing through dense waves.
Use area denial to soften grouped enemies before they hit the frontline.
Healing and support tools reduce wipe risk when public teams lose formation.
Class Guides
These role guides cover the high-intent searches players use after they understand the basic loop and want better wave consistency.
Healing coverage, timing discipline, support economy, and public match value.
Role guideLong angles, elite focus, reload timing, and clean ranged damage habits.
Role guideTurret placement, barricade protection, solo limits, and when to move to stronger anchors.
Role guideLate-wave scaling, 200,000 Credit planning, minion pressure, and Death Nova discipline.
Medic Guide
Medic is a stable early unlock because sustain reduces public-lobby mistakes and keeps the team alive through pressure spikes.
Marksman Guide
Marksman works when positioning is disciplined. The class rewards long angles, target focus, reload timing, and avoiding tunnel vision.
Engineer Guide
Engineer teaches structure defense, but the value depends on protected placements and clear timing for when to stop buying fragile setups.
Start with the lane that is closest to collapsing, then protect the structure so it does not get deleted immediately.
Buy them after your basic damage path is stable and when a protected firing spot exists.
It helps teach defense, but solo consistency still depends on weapon upgrades and movement discipline.
Necromancer Guide
Necromancer is a late-wave scaler. It should be treated as a major Credit target, not a casual early purchase, because its value appears when density and elite pressure are high.
Enemies Guide
Enemy priority decides whether defense holds. Clear elites before structures break, compress large packs near controlled lanes, and retest choke assumptions after updates.
Dangerous through numbers when team damage is split too widely.
Break weak defenses quickly and should be focused before barricades collapse.
Compress them near controlled lanes, then clear with traps, crowd control, or burst tools.
Can become resource value for late-game class mechanics when handled safely.
Patch changes can alter pathing, so re-test old choke assumptions after updates.
Leaderboard Guide
Leaderboard progress is a one-run endurance problem. Protect the current attempt, assign roles early, and avoid risky skips that erase a strong setup.
Official Links
Track new code drops, patch notes, game-page changes, studio signals, and update watchlists from official or clearly labeled community sources.
Main play entry and official listing for the experience.
Best place to watch for code drops, patch notes, and developer announcements.
Studio community page for group updates and Roblox-side signals.
Track patch notes, sneak peeks, movement changes, and new content previews.
Source status
Use this site as a practical wiki hub, but do not confuse community-reported claims with direct official proof. That distinction is the safety layer.
Coverage model
The homepage structure follows high-intent competitor topic coverage, but the wording, source boundaries, and safety exclusions are rewritten for this site.
Navigation pattern for codes, classes, tier list, weapons, maps, waves, loadouts, and updates.
Broad topic coverage for classes, weapons, tiers, credits, waves, and multilingual expansion.
Topic discovery only. Script and macro pages are excluded for safety.
FAQ
No. This is an independent fan guide and is not affiliated with Roblox Corporation or Nectarforge Studios.
It lists community-reported code claims, but does not call them officially verified without official or in-game proof.
Start with Codes, then Classes, Tier List, Weapons, and Value List from the wiki hub cards.
Ready for the next wave?
Check codes, pick a class path, plan weapon upgrades, and enter Survive Zombie Arena with a safer progression route.